Making the Gryffindor fireplace: Very exciting and iconic. The support walls or legs of the fireplace will be wooden cubes from the dollar store, and glued together.

Wood from a Home depot kid's kit is used for the header. Sand mixed with paint will add texture and make it look like stone. A tiny piece of trim is glued to the top of the header for the mantel. Using polymer clay, a scalloped stone is made to top the right leg of the fireplace.


Painted and dry fitting it in the tower.


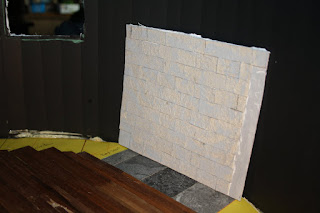
Using foam board and egg carton stones is an inexpensive and easy to get materials, but it is labour intensive to do.

The little rectangle box to the left is a bench seat.


I decided to make a flat wall behind the fireplace with egg carton "stone". The back of the firebox needs soot, so I mixed crushed black baked polymer clay with black paint and sponged it on. Foam board and egg carton "stone" are used to finish the leg, side and back of firebox of the fireplace.


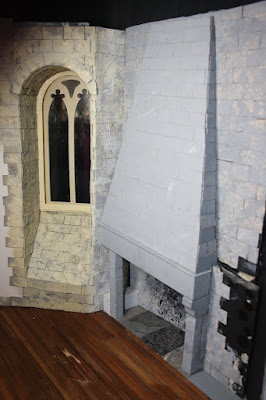
The chimney part will be made with nail files instead of egg cartons. I thought it would look even more like stone. Here I have a cardstock template for the stone in orange. Be warned, cutting nail files repeatedly will ruin your scissors. I sacrificed an old pair but it was worth it.


The support for it is foam board. Adding a little trim to the mantel.

Glueing egg carton stone on foam board for the back of the chimney and the side.


Glued in place, it looks very similar to the fireplace in the movies. The tapestry on the right is just a paper copy for the moment, to dry fit it in until I make a tapestry of cloth.

Still waiting for my Gryffindor badge to come in the mail to glue to the chimney.
Finally, the badges came in! One is really a keychain.

It is a little small for the fireplace.
The other one is a rubber or silicone luggage tag, and after much thought, the decision was made to use this as the fireplace emblem.

Here it is painted with acrylic paint


All finished! Maybe it needs a bigger fire and some wet socks hanging on a fireplace screen. It would be cool to have Sirius Black's face in the fire!
Here's a short picture video you might enjoy!

Wood from a Home depot kid's kit is used for the header. Sand mixed with paint will add texture and make it look like stone. A tiny piece of trim is glued to the top of the header for the mantel. Using polymer clay, a scalloped stone is made to top the right leg of the fireplace.


Painted and dry fitting it in the tower.


Using foam board and egg carton stones is an inexpensive and easy to get materials, but it is labour intensive to do.


The little rectangle box to the left is a bench seat.


I decided to make a flat wall behind the fireplace with egg carton "stone". The back of the firebox needs soot, so I mixed crushed black baked polymer clay with black paint and sponged it on. Foam board and egg carton "stone" are used to finish the leg, side and back of firebox of the fireplace.


The chimney part will be made with nail files instead of egg cartons. I thought it would look even more like stone. Here I have a cardstock template for the stone in orange. Be warned, cutting nail files repeatedly will ruin your scissors. I sacrificed an old pair but it was worth it.


The support for it is foam board. Adding a little trim to the mantel.

Glueing egg carton stone on foam board for the back of the chimney and the side.


Glued in place, it looks very similar to the fireplace in the movies. The tapestry on the right is just a paper copy for the moment, to dry fit it in until I make a tapestry of cloth.


Still waiting for my Gryffindor badge to come in the mail to glue to the chimney.
Finally, the badges came in! One is really a keychain.

It is a little small for the fireplace.
The other one is a rubber or silicone luggage tag, and after much thought, the decision was made to use this as the fireplace emblem.

Here it is painted with acrylic paint


All finished! Maybe it needs a bigger fire and some wet socks hanging on a fireplace screen. It would be cool to have Sirius Black's face in the fire!
Here's a short picture video you might enjoy!