Wednesday, May 6, 2020

Tapestries and portraits in the Gryffindor common room in miniature Harry Potter


Making the tapestries. This took a lot of research, and even experiments. I settled on a technique called photo transfer. My mother gave me some old coffee table cloths that were stained and/or had holes in them. The mixture used was equal parts Omni Gel, antique matte Mod Podge, and matte gel medium. This mixture is then thickly applied with a brush to the mirrored image on laser copy paper, then the cloth is applied to the mixture. After drying for 24 hrs, the paper backing is sloughed off with water and a sponge.


These tapestries look pretty good! But they still need the velvet trim. Using an iron on trim purchased from Michaels. It looks too new, but I am pleased that they look like the tapestries in the movie. Weldbond is used to glue them to the walls.


After this exciting moment, we must now turn our attention to what goes on the walls. The portraits! This proved difficult to find all the portraits to print, and some were definitely not high def, but I am pleased with it. Using trim from my wood stash, the picture frames were made to fit on each of the portraits. The paint used is a beautiful gold.


The portraits themselves were sealed with antique matte Mod Podge, and brushing multiple layers in a cross hatch pattern hopefully gives it a oil painting look.  They are glued to some box card for stability.Wood glue is used to glue the portrait into the frame.  Contact cement is used to glue old jewelry chain to the back of the portrait.


The chain is attached to the wall with pins.


Stay tuned for more!

Friday, April 10, 2020

Pandemic masks and headbands

The news had a local hospital asking for people that can sew to make masks. Having a whole tote of fabric, a sewing machine, a little time on my hands, and a helpful spirit, I went to work!
I made some children's masks, and to make them more appealing, ironed on flowers and appliques.


The nurses are complaining that their ears are sore because of their masks, we are making headbands with buttons so they can give their ears a break.


rectangular masks are easy to knock out.


Saturday, February 29, 2020

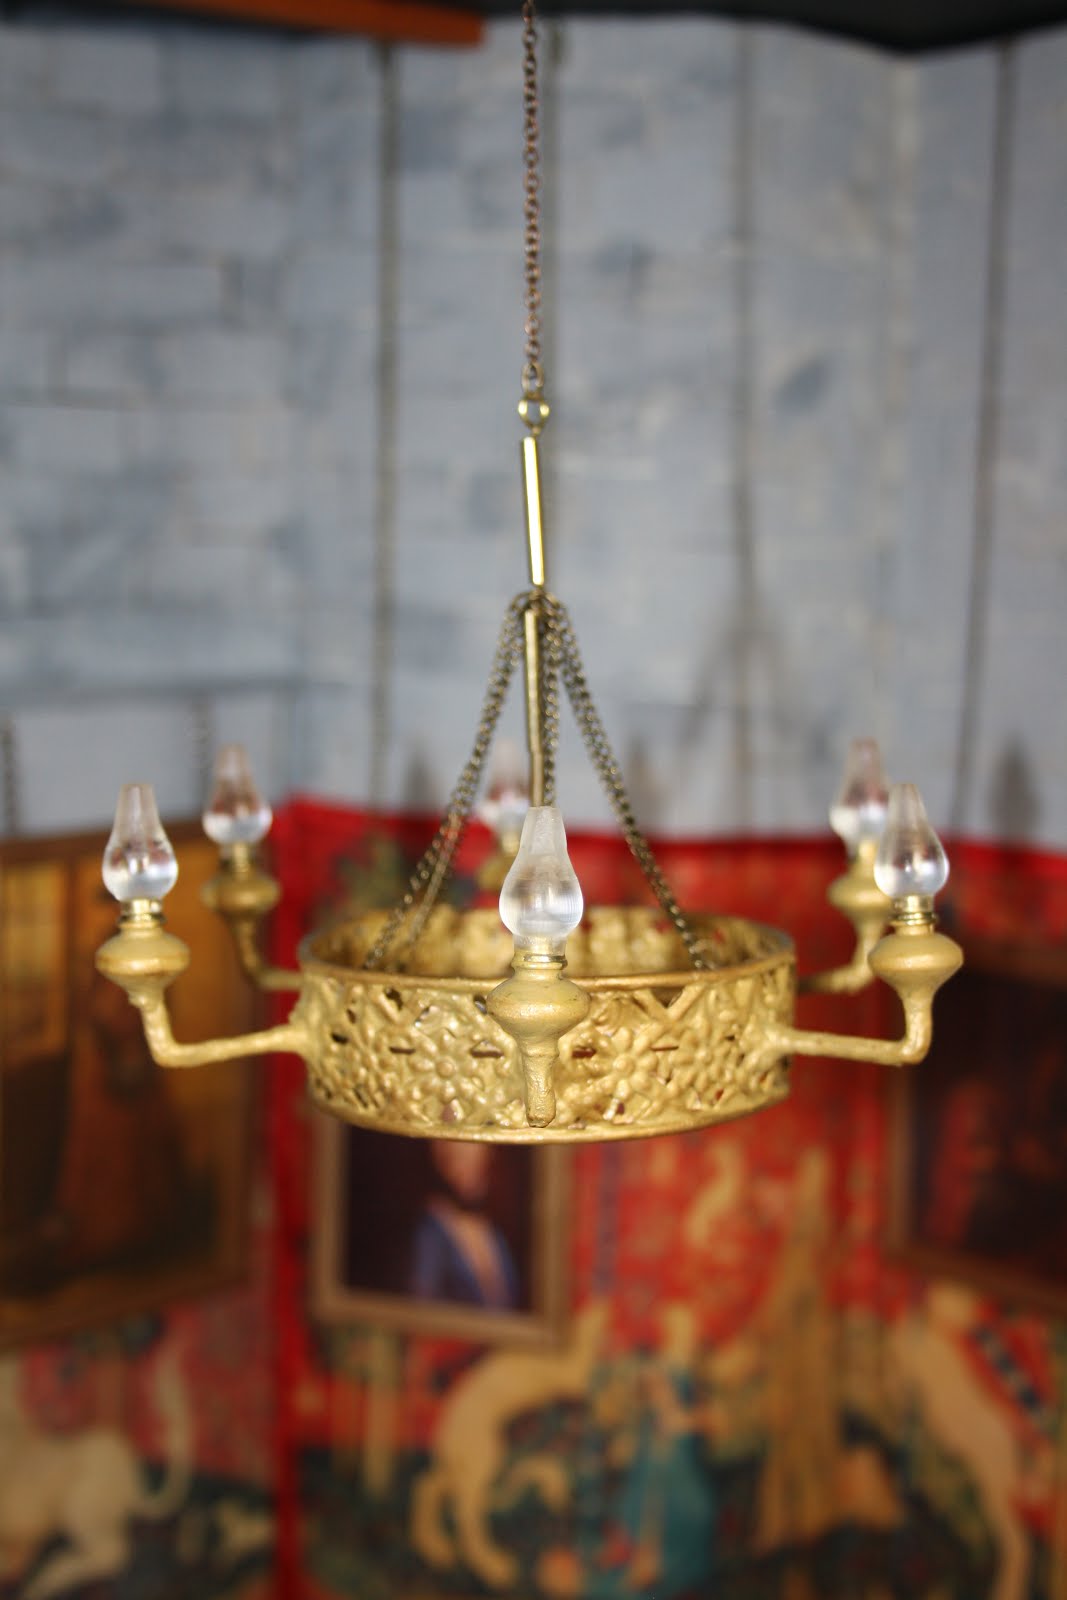
Harry Potter Gryffindor Common room Chandelier

This chandelier isn't the kind of thing I could shop for and purchase! Here is a picture of the original from the movies.


No luck in finding a match for the 6 lamps, but the ones I ordered at miniLAND can be modified.
A friend hacksawed the bottoms off of the lanterns. 


The band was the hardest to figure out. First I tried cutting out the band with cardstock on my Silhouette Cameo, but it was just too fine. Then another workfriend had some aluminum ribbon which she gave me. I folded it to size, connected it after wrapping it around a tube, and glued round wire around the top and bottom.

I would like to use metal for the lamp arms, but I can also try paper q-tip sticks, as you can bend them when moistened. Then, it can be painted a metallic colour. I had been watching Bentley House Minis and she used cotton swab sticks and that was what I did too. The middle piece in gold is polymer clay.


It took alot of research and measuring to get the right lengths, but eventually it looks the right size and proportion. The glue was contact cement, which I knew can be painted over. It is not entirely symetrical, but hopefully it will hang levely.


The cotton swab sticks are soaked in water and then bent. After drying, I painted on some wood glue to make it smoother and strengthen it, especially at the bended part.
Here is a red lid found in the kitchen that will hold the cotton swab sticks as they are being glued.


Forgot to take some pictures, but the whole thing was painted with gold paint. Then with the use of some plasticine for support, the lamps were glued with Gorilla glue gel.


Adding the chain and metal was a challenge. Wish my tool box was more well stocked as I only had one small set of pliers, when I really needed two!


The exciting part - attaching it to the ceiling!


Hope you think it looks good. I am pleased with it and may have to distress it a little

Enjoy this little picture video!


Wednesday, February 12, 2020

food challenge

day 1: Today is a bit of a different blog, but can still be considered as a form of creativity - cooking! The challenge I have set for myself is to use up all my groceries at home. I will still buy the usual staples - bread, milk, eggs and veggies. There are just so many items sitting in my cupboards not being used. The first meal I made was noodles, and a rice paper wrap with meat balls. sounds weird, but it was a quick and easy meal. The second meal is a red lentil soup and for dessert a lentil brownie. Wish me luck for tomorrow!
Day 2: Today is sour milk pancakes. Also made some homemade turnovers that was a big hit.
Day 3 buying pita bread and making donairs with leftover donair sauce.
Day 4: using up cheese sauce on broccoli
Day 5: dry rub on roast with old spices
Day 6 : Using up oatmeal that was hidden in the back of the cupboard
Day 7 : crushing up crotons and using them as breadcrumbs for hamburger patties
Day 8 : banana bread with old bananas

Sunday, January 12, 2020

Mosaic Tile Art

Looking to make something cool for my family that is personalized, I came across a youtube video of mosaic tile art. It featured tile covering a trinket or jewelry box. So looking through my stash of craft supplies is a must. The first find is a box of scrabble tiles. This will be my desired thickness for the other tiles. Searching in the kitchen also brings up a fondant roller, and some texture plates. The fondant roller has 2  thickness pieces so the tile will be a uniform thickness. My jewelry stash is key for charms and metal that can be embedded in the clay. Even going in my scrapbooking collection yielded rubber stamps and some metal brads and keys. In addition, pearlex powder was used for different looks, and also some jewelry enamel paint for some of the charms and stamped tiles. This added colour and interest

Here is my first attempt at mosaic tile art. It is a plastic book box that is Harry Potter themed. I think it originally had a game or sticker collection in it. The front cover had a recessed area that can be filled with tiles. Most of it is scrabble tiles with Harry Potter pictures and dimentional magic on top.
Also in the top gold bakeable clay tiles are a lightning bolt and a deathly hallows symbol.


My second project almost made itself. This photo frame is a great base for a space themed mosaic tile art piece. The scrabble tiles miraculously fit vertically. In my button collection there was  planet buttons, and although they are plastic, they can be glued onto the clay tiles after they have cooled from baking in the oven. Some computer parts were embedded in the clay. As you can see, anything can be used!


The third one will be for me! This project will be on a serving tray that will become a wall hanging. We found it at Value Village for $4. Gesso is applied. Then, paint is mixed with all purpose sealer. The mixture is allowed to dry and then lightly sanded. The paint is important as not all the tiles will sit together perfectly, and a little colour underneath will look better.


Using only 3 colours will keep it looking not too busy. Funny story, as I was making some tiles, the cat jumped up and stepped on the soft clay, so I decided to make a tile of her paw print. Here she is her name is Snowball


Here is my completed artwork.


And here is my longest secret I've kept - a whole year in the making - personalized tile boards for all the kids in my family.  I used charms, metal findings, beads, stamps, shells, number tiles and even stones. Some tiles are glazed, and some are not. Each have a cross because we're Christian, and a maple leaf because we're Canadian, and they each have their Zodiac sign. This was a very long project but well worth it.

Here is the first for a boy who loves his sport - football. I wanted to design his to look adult as kids have a habit of growing older, and it's my hope he'll want to keep it as an adult. I chose dark colours and a chunky jewelry theme.


The next three are for the girls and they each had a different colour preference. Each one has the same jewelry piece to tie them all together as family.
This one was fun as I fit in a lot of jewelry I had in my stash.


Tori's  is purple and has some running charms.


It was good I had a unicorn in my jewelry stash as someone loves unicorns!
She liked the blinged key the best.


Hope this inspires you to try something different.