Wednesday, May 6, 2020

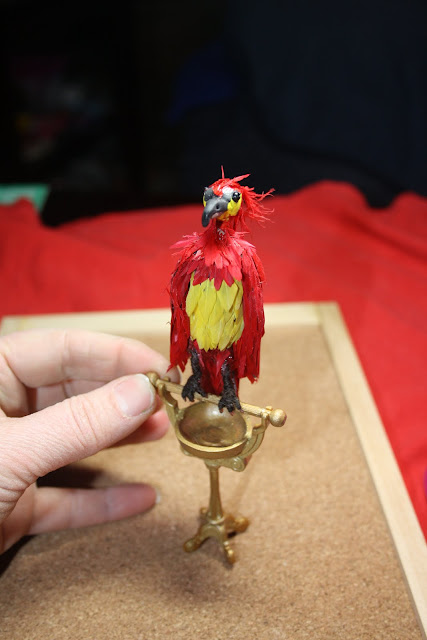
Fawkes the phoenix bird stand project from Harry Potter

My mom and I go to the thrift store regularily and that is where I find most of my miniature treasures.
Taking the time to go through the kid's toy bags can reap rewards. This is what I found and I was so excited to come home and modify it to make a stand for this bird. I think it is a beauty and the beast toy set.

.

Cutting down a butter container for the bird pan.


Using gorilla super glue is good with plastic.


Painting with a metallic paint to make it all come together.


The bar is a simple dowel and 2 beads


Wood glue works well.


Painting it the same metallic paint.


Here it is all put together. It does work well and I am pleased with the result.


Although Fawkes does look a little big on his stand, I'm happy with this project.


Gryffindor fireplace from Harry Potter

Making the Gryffindor fireplace: Very exciting and iconic. The support walls or legs of the fireplace will be wooden cubes from the dollar store, and glued together.


Wood from a Home depot kid's  kit is used for the header. Sand mixed with paint will add texture and make it look like stone. A tiny piece of trim is glued to the top of the header for the mantel. Using polymer clay, a scalloped stone is made to top the right leg of the fireplace.


Painted and dry fitting it in the tower.


Using foam board and egg carton stones is an inexpensive and easy to get materials, but it is labour intensive to do.


The little rectangle box to the left is a bench seat.


I decided to make a flat wall behind the fireplace with egg carton "stone". The back of the firebox needs soot, so I mixed crushed black baked polymer clay with black paint and sponged it on. Foam board and egg carton "stone" are used to finish the  leg, side and back of firebox of the fireplace.


The chimney part will be made with nail files instead of egg cartons. I thought it would look even more like stone. Here I have a cardstock template for the stone in orange. Be warned, cutting nail files repeatedly will ruin your scissors. I sacrificed an old pair but it was worth it.


The support for it is foam board. Adding a little trim to the mantel.


Glueing egg carton stone on foam board for the back of the chimney and the side.


Glued in place, it looks very similar to the fireplace in the movies. The tapestry on the right is just a paper copy for the moment, to dry fit it in until I make a tapestry of cloth.


Still waiting for my Gryffindor badge to come in the mail to glue to the chimney.
Finally, the badges came in! One is really a keychain.


It is a little small for the fireplace.
The other one is a rubber or silicone luggage tag, and after much thought, the decision was made to use this as the fireplace emblem.


Here it is painted with acrylic paint


All finished! Maybe it needs a bigger fire and some wet socks hanging on a fireplace screen. It would be cool to have Sirius Black's face in the fire!
Here's a short picture video you might enjoy!


Tapestries and portraits in the Gryffindor common room in miniature Harry Potter


Making the tapestries. This took a lot of research, and even experiments. I settled on a technique called photo transfer. My mother gave me some old coffee table cloths that were stained and/or had holes in them. The mixture used was equal parts Omni Gel, antique matte Mod Podge, and matte gel medium. This mixture is then thickly applied with a brush to the mirrored image on laser copy paper, then the cloth is applied to the mixture. After drying for 24 hrs, the paper backing is sloughed off with water and a sponge.


These tapestries look pretty good! But they still need the velvet trim. Using an iron on trim purchased from Michaels. It looks too new, but I am pleased that they look like the tapestries in the movie. Weldbond is used to glue them to the walls.


After this exciting moment, we must now turn our attention to what goes on the walls. The portraits! This proved difficult to find all the portraits to print, and some were definitely not high def, but I am pleased with it. Using trim from my wood stash, the picture frames were made to fit on each of the portraits. The paint used is a beautiful gold.


The portraits themselves were sealed with antique matte Mod Podge, and brushing multiple layers in a cross hatch pattern hopefully gives it a oil painting look.  They are glued to some box card for stability.Wood glue is used to glue the portrait into the frame.  Contact cement is used to glue old jewelry chain to the back of the portrait.


The chain is attached to the wall with pins.


Stay tuned for more!